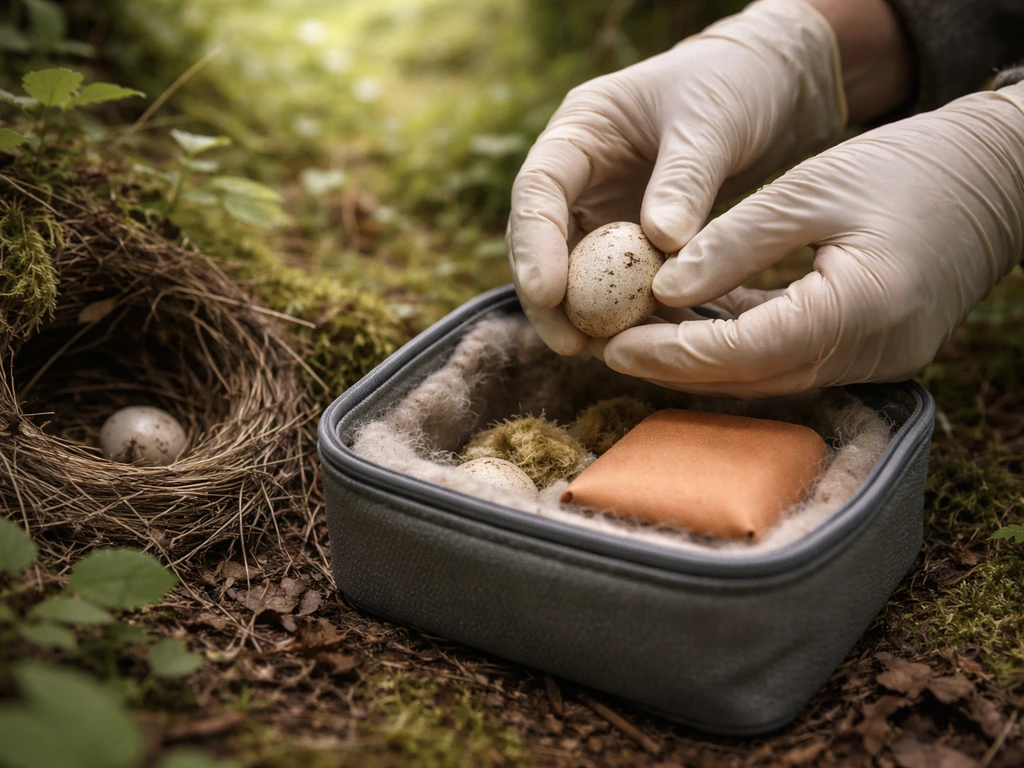
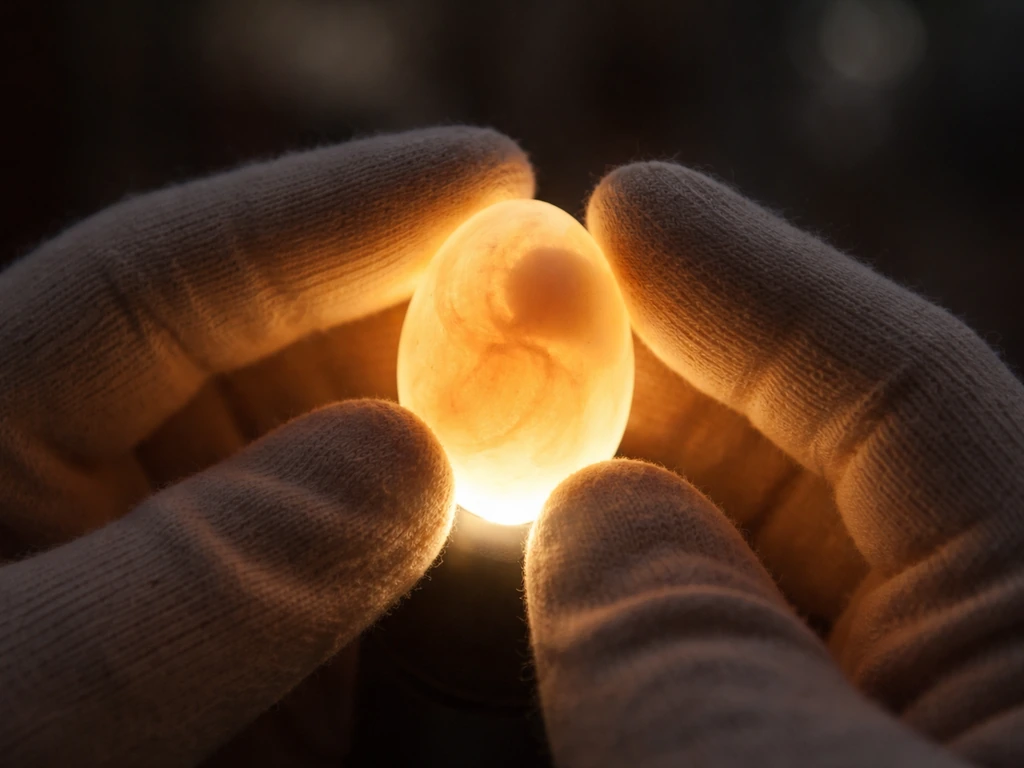
Candling a bird egg means holding it up to a bright light in a dark room so you can see what's happening inside the shell without cracking it open. Done carefully, it tells you whether an embryo is developing, whether the egg has already died, or whether it was never fertilized in the first place. That information helps you decide whether to keep incubating, return the egg to a nest, or stop trying and focus your energy elsewhere. If you ever need to drain a bird egg instead, focus on safe, expert guidance first since improper handling can cause injury or contamination candling.
How to Candle a Bird Egg: Step-by-Step, What to Look For
Marcus Holloway
18 May 2026
What candling a bird egg tells you (and why it matters)
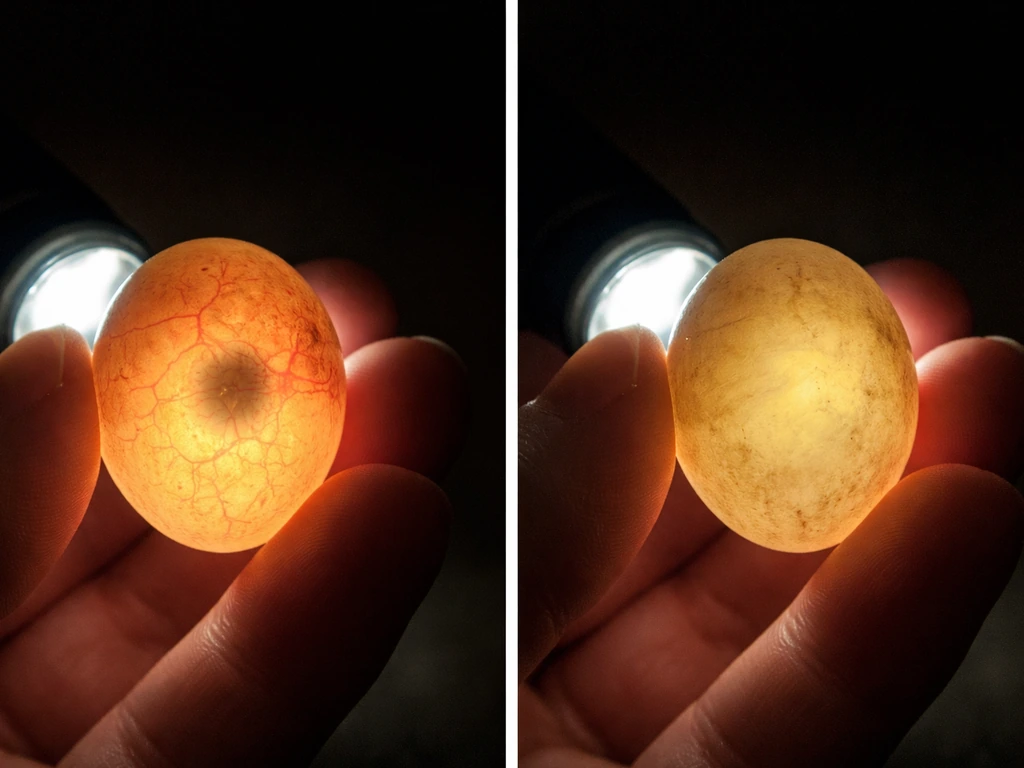
When you're dealing with an abandoned or orphaned egg, uncertainty is the hardest part. Candling cuts through that uncertainty by giving you a real look inside. A developing egg will show a web of blood vessels spreading out from a small dark center (the embryo). An infertile or very early-death egg will look mostly clear, with maybe a faint yolk shadow drifting around. A more advanced dead embryo will often show a blood ring, where the blood has pulled away from the embryo and formed a dark circular outline near the center of the egg. In the later stages of development, a healthy egg will look almost entirely dark because the chick fills most of the shell.
Without candling, you're guessing. You might incubate a non-viable egg for weeks, wasting time and resources, or worse, give up on a healthy one too soon. Even in conservation and wildlife research contexts, candling is a standard, non-invasive way to check egg status. It's a practical skill that makes a real difference when an egg's fate is in your hands.
When you should candle vs when you should call a wildlife rehabilitator
Candling is appropriate when you're already responsible for an egg and need to make an informed decision about continuing care. If you've found an egg that appears abandoned, has been out of a nest for a while, or is part of a rescue situation you're managing, candling gives you real information to work with. Candling can be used to determine the embryo development stage and egg viability decisions for eggs suspected to have been abandoned or left without parental care candling gives you real information.
But there are situations where you should stop and call a licensed wildlife rehabilitator instead of trying to handle things yourself. Contact a professional if:
- The egg is cracked, wet, or has a strong odor (these are signs it may be compromised in ways that need expert assessment)
- The egg is completely cold and has been out of the nest for an unknown length of time
- You're dealing with a migratory bird species (these are protected under federal law in the US, and handling or rehabilitating their eggs requires a permit)
- You're unsure whether the parent bird has actually abandoned the nest (parents often leave temporarily and return)
- You don't have a proper incubator setup and the egg needs ongoing care after candling
The US Fish and Wildlife Service is clear that migratory bird rehabilitation falls under federal permit requirements. When in doubt, a licensed wildlife rehabilitator is your best resource, and reaching out to one early is always the right call. Candling is a tool for informed caregiving, not a substitute for professional help when the situation calls for it.
Supplies and safe setup for candling
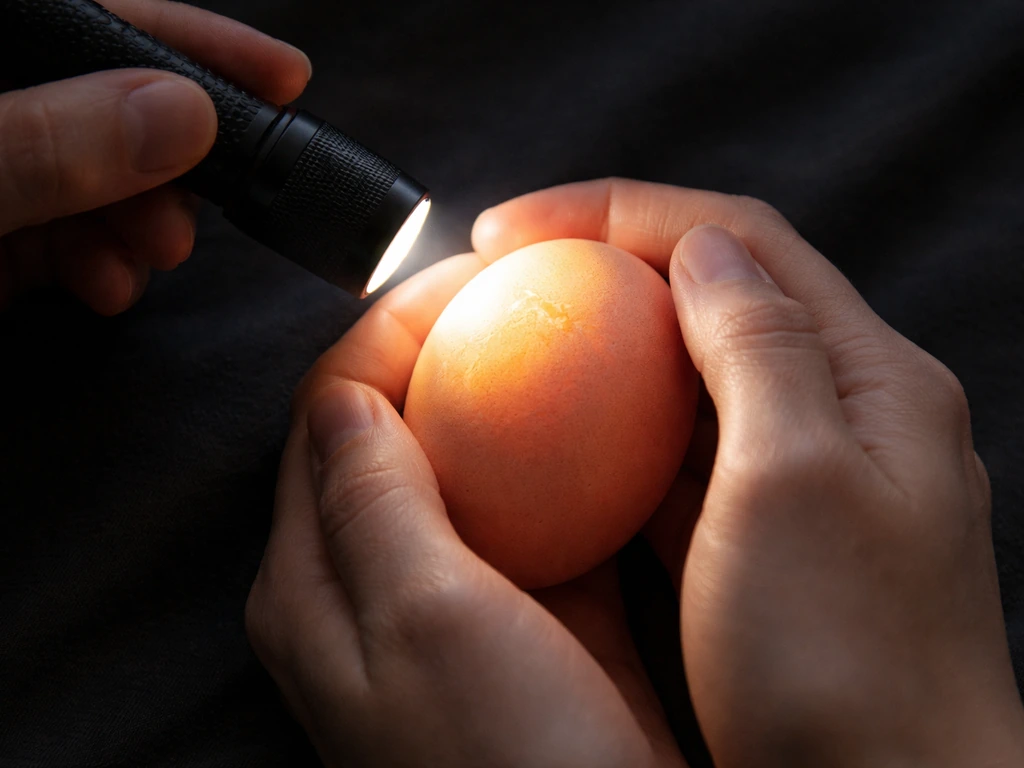
You don't need specialized equipment to candle a bird egg. A bright, focused light source is the main thing. A small LED flashlight with a tight beam works well. Some people use a purpose-built egg candler, but a strong flashlight does the same job. The key is that the light needs to be bright enough to penetrate the shell.
Here's what to gather before you start:
- A small, bright LED flashlight or a dedicated egg candler
- A dark room or closet (the darker the better, especially for darker-shelled eggs)
- Clean, dry hands (no lotions or chemicals that could transfer to the shell)
- A soft cloth or foam pad to set the egg on if you need to put it down briefly
- A timer to track how long the egg is out of the incubator
Keep the egg warm before and after candling. If you're actively incubating the egg, have your incubator set and ready so you can return the egg immediately. The whole point of the setup is to minimize the time the egg spends away from a controlled temperature environment. Keep your workspace clear and your movements calm and deliberate.
Step-by-step: how to candle a bird egg without harming it
- Wash your hands thoroughly and dry them completely. Even small amounts of oil or bacteria on your hands can affect a developing egg.
- Prepare your dark room and have your light source ready and turned on before you take the egg out of the incubator.
- Remove the egg gently from the incubator using two fingers, cradling it from underneath. Never grip or squeeze it.
- Carry the egg to your darkened space and hold it with the large end (where the air cell is) facing up, or hold it horizontally if that's easier. The goal is a stable, secure hold.
- Press the light source gently against the large end of the egg, or hold the egg directly above the light if your candler shines upward. Don't press hard enough to risk cracking the shell.
- Allow your eyes a moment to adjust to the dark, then look through the egg carefully. Rotate it slowly with your fingers to view different angles.
- Take a mental note of what you see (use the guide in the next section), then return the egg to the incubator promptly.
- Record what you observed and the date so you can track changes over time.
The whole process should be quick and focused. You're not studying the egg for several minutes, you're taking a careful look and making observations. Keep your movements smooth and avoid bumping or jolting the egg at any point.
How to read what you see (infertile, developing, blood ring, dead-in-shell)
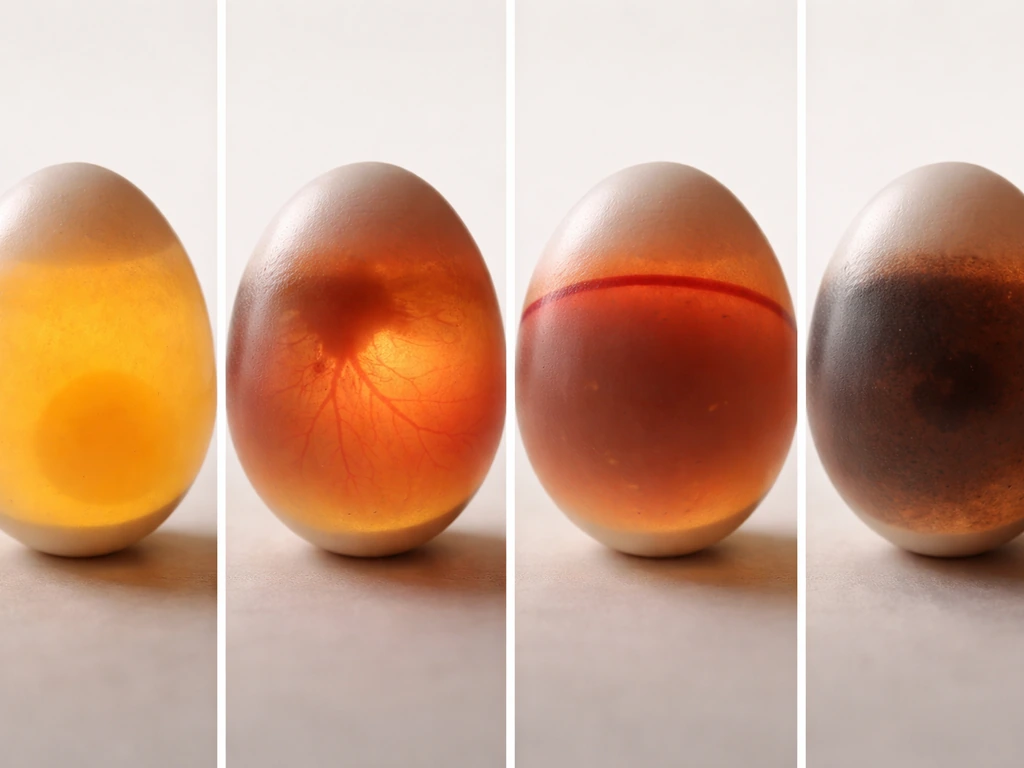
Interpreting what you see takes a little practice, especially with darker or smaller eggs, but here's a practical breakdown of the main things you'll encounter:
| What you see | What it means | What to do |
|---|---|---|
| Clear, with only a faint yolk shadow that moves freely | Infertile egg or very early embryo death (sometimes called a 'yolker') | Likely not viable; consult a rehabber before discarding |
| Small dark spot with red/pink blood vessels radiating outward | Healthy early development (typically visible from days 5–7 onward) | Continue incubating; egg is developing normally |
| Dark ring or circle of blood visible near the center | Blood ring: embryo died early and blood has pooled away from it | Egg is no longer viable; stop incubation |
| Mostly dark interior with an air cell visible at the large end | Late-stage development; chick is filling the shell | Continue incubating; chick is close to hatching |
| Murky, dark, or greenish interior with no clear structure | Bacterial contamination or advanced embryo death | Remove from incubator immediately to protect other eggs |
One thing to keep in mind: brown or heavily pigmented eggs are genuinely harder to read, especially in the first week. Before day 5 or 6, even a healthy egg may look unclear. Don't make a final call on a dark-shelled egg until it's had at least several days of incubation. Early-death cases can also look similar to infertile eggs because the embryo is so small. If you're uncertain, wait a few more days and candle again rather than discarding the egg prematurely.
Timing, temperature, and how long to candle (risk reduction)
The biggest risk during candling isn't the light itself, it's the temperature drop the egg experiences while it's out of the incubator. Keep the egg out for no more than 5 to 10 minutes at a time. That's the standard guidance, and it's worth taking seriously. Even a few extra minutes in a cool room can disrupt development, particularly in the early stages.
In terms of timing during incubation, the first good window to candle is generally between days 5 and 10. Before day 5, most eggs (especially darker ones) won't show enough development to read clearly. There's also a window to avoid: some incubation experts specifically caution against candling between days 11 and 14, because the embryo is repositioning itself during this period and disturbance can interfere with that process. After day 14, the egg is mostly dark anyway and candling gives limited new information.
Candle as few times as necessary. Once between days 6 and 10 is usually enough to get useful information. Each candling session is a small stress to the egg, so more frequent checks don't help and can introduce risk. Treat each session as purposeful, not casual.
Also, avoid using heat-generating light sources like incandescent bulbs held directly against the shell for extended periods. LED lights are preferred because they produce minimal heat. The goal is light transmission, not warmth.
What to do after candling: next steps and when to seek help
Once you've candled and have a read on the egg, here's how to think through your next move:
If the egg shows healthy development, continue incubating it under consistent conditions. Temperature, humidity, and turning schedules all matter, and those details are closely tied to how you incubate and care for the egg through to hatching. If you are deciding whether to keep incubating after candling, you’ll want to follow reliable instructions on how to incubate bird eggs, including temperature, humidity, and turning schedules. Make sure your setup is stable and that you have a plan for what to do once the egg hatches, because a newly hatched wild bird will need specialized care.
If the egg appears infertile or shows a blood ring, it's almost certainly non-viable. Before you discard it, though, check in with a wildlife rehabilitator or your local wildlife agency if you have any doubt. Some early-stage readings are ambiguous, and a second opinion from someone with more experience is always worthwhile.
If the egg is from a wild bird and candling suggests it's still developing, you need to think seriously about whether you're the right person to see this through. Caring for a wild bird egg through hatching and beyond requires proper incubation equipment, knowledge of the specific species' needs, and often a permit. Contacting a licensed wildlife rehabilitator at this point isn't giving up, it's giving the egg and eventual hatchling the best possible chance. Many rehabilitators are glad to advise even if they can't take the egg directly.
If the egg is cracked, foul-smelling, or shows signs of leaking, handle it very carefully and isolate it from any other eggs. A compromised egg can contaminate nearby eggs, and a cracked shell changes everything about how you'd approach further care. This is a situation where professional guidance matters most. If an egg becomes egg-bound, you should not improvise at home, and you can use safe guidance on how to massage an egg-bound bird while you seek professional help how to massage egg bound bird.
The emotional weight of holding a tiny egg and trying to do right by it is real, and it's okay to feel uncertain. But you've already done the most important thing by trying to get informed rather than guessing. Use what you've seen during candling as a guide, act on it quickly, and don't hesitate to bring in a professional when the situation is beyond a straightforward home care scenario.
FAQ
What should I do if the egg is already cold before I start candling?
If the egg feels cold to the touch or you can’t quickly return it to your incubator or nesting area, pause and stabilize the temperature first. Candling while the egg is cooling can make early development harder to interpret and increases stress. Keep sessions short (typically under 10 minutes) and plan your setup so the egg goes back immediately.
Why does a developing egg sometimes look infertile on the first candling?
Candling a fertilized egg does not always look “dark or red” the way people expect. In the first week, especially with brown or heavily pigmented shells, a developing embryo can still be difficult to see, so early “clear” results may be misleading. A practical rule is to wait until at least day 5 to day 6 for a more reliable read, and if unsure, candle again after a few days rather than discarding.
How can I tell the difference between an infertile egg and an early-death egg?
Don’t automatically assume “infertile” if you see very faint features, especially early. Early death and true infertility can look similar because the embryo is tiny at first. If the egg is from a species where incubation timing is known, follow the timeline, then confirm with a second candling window a few days later before making a final decision.
Is it okay to rotate or reposition the egg a lot to see better during candling?
Use only enough handling to get the light through the shell, then stop. Avoid shaking, wiping aggressively, or rotating the egg repeatedly “to get a better view.” If your incubation plan includes turning, keep turning consistent with your incubation method, not your candling preferences.
Can I candle more often than once between day 6 and 10 to be sure?
Yes, but you should manage the practical risk. Every time you candle you expose the egg to cooler air and disrupt stability, so more frequent checks do not speed things up. Aim for minimal purposeful sessions (the article’s main window is roughly day 5 to day 10, with one additional check only if needed for uncertainty).
Why does the type of flashlight matter for candling?
Incandescent bulbs can create localized heat if they are close to the shell for more than a moment, which can be harmful depending on exposure time. LED flashlights with a tight, bright beam are preferred because they generate less heat, and you should keep the egg’s contact with any heat source brief.
Should I candle if the egg is cracked or leaking?
If the egg is leaking, cracked, or has an unusual smell, treat candling as a “do not proceed at home” situation. Even if you can see inside, the priority is contamination control and preventing spread to other eggs. Isolate it, and seek professional guidance because the care approach changes when the shell integrity is compromised.
What’s the best next step if I suspect it’s a developing wild bird egg?
If you find what looks like a still-developing wild bird egg, the key decision is responsibility and permits. Many rehabilitators can advise you even if they cannot take the egg immediately, but you should not rely on home incubation alone because wild species often have specific incubation requirements. Contact a licensed wildlife rehabilitator early so you know what is permissible and what care is appropriate.
What if I’m not sure my “blood ring” observation is correct?
If candling suggests non-viability (for example, a blood ring) it is usually appropriate to stop incubating, but it helps to verify timing and interpretation first. If you are uncertain or the egg is from a species you cannot confidently time, ask a wildlife professional for a second read before discarding.
If the egg looks healthy when candled, how do I prepare for hatching afterward?
Don’t plan for a “set and forget” outcome after candling. If the egg is developing, confirm your incubation parameters (temperature, humidity, and turning) match the species and your incubation method, and have a plan for post-hatch care since newly hatched birds generally require specialized handling.
Next Article
How to Safely Move Bird Eggs: Step by Step Rescue Guide
Step-by-step guide on how to safely move bird eggs, protect, keep warm, avoid damage, and know when to call a wildlife r